The days are getting shorter but that doesn’t mean there’s less time to make crafts with your kids. Here are some fall-themed crafts for you and your preschooler to make the fall nights fun. And maybe, they’ll make a great Thanksgiving table centerpiece!
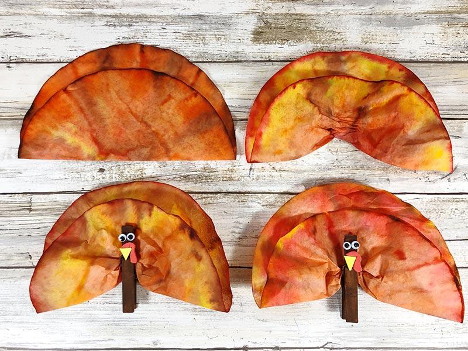
1. Coffee Filter Turkeys
Supplies:
Wooden clothespins
Round white coffee filters
Assorted googly eyes
Washable markers – Brown, red, orange, yellow
Glue gun and glue sticks
Brown acrylic craft paint
Red and yellow craft foam
Paintbrush
Scissors
Pencil
Scrap of cardboard
Instructions:
Start by flattening out round coffee filters. Draw on them with several colors of washable markers in a variety of patterns. Using colors next to each other on the color wheel helps them blend harmoniously. For example, brown, red, orange, and yellow. Lay the colored coffee filter on a craft mat or zipper bag and spray with water. Have fun watching the magic of the colors move and blend! Set aside to dry. Use a scrap of cardboard to clip the clothespins onto for easier painting. Paint all sides of the clothespin with brown craft paint and a paintbrush. Set aside to dry. Glue on the wiggly googly eyes. You can use a low temp hot glue gun or a tacky craft glue. Now it’s time to decorate the turkey’s face! Cut out a triangle beak from yellow craft foam and a squiggly waddle from the red craft foam with scissors. Glue the beak and gobbler under the eyes. Fold the dry coffee filters in half and crinkle slightly to fluff them. Insert coffee filter into the top clip of the clothespin to be the turkey’s feathers.You can insert the dyed coffee filter as is or cut a scalloped edge to give the feathers more definition.
Via Darcy and Brian
2. Paper Plate Acorns

Supplies:
Paper plates
Dark brown craft paint
Foam paint brush
Brown cardstock
Black marker
Kid-friendly scissors
Stapler
Googly eyes
School glue
White Puffy Paint
Instructions:
First, paint your paper plate with the brown craft paint and set aside to dry completely. Cut a half circle (the acorn shell) and stem out of the brown cardstock. Use the black marker to draw lines on the half circle to give it some dimension. Next, staple the acorn shell and stem to the paper plate. Then glue on the googly eyes and draw a smile using the white puffy paint.
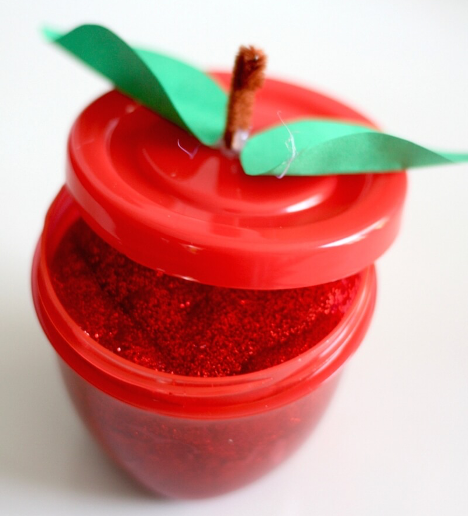
3. Apple Slime
Ingredients:
½ cup clear school glue
1 tbsp saline solution (must contain boric acid and sodium borate)
½ cup of water
½ tsp baking soda
2 tsp nutmeg
3 tsp cinnamon
Red food coloring and glitter
Optional: chia seeds or flaxseed
Instructions:
Start by adding ½ cup of glue to your bowl and mix with ½ cup of water. Add food coloring and glitter as desired and stir. For a little bit of texture you can add chia seeds or flaxseed to the mixture. Stir in 1/2 tsp baking soda. Mix in 1 tbsp saline solution and stir until your slime forms and pulls away from the sides of the bowl. If your slime still feels too sticky, you may need a few more drops of saline solution.. Kneading the slime really helps to improve it’s consistency. The trick with saline solution slime is to squirt a few drops of solution onto your hands before picking up the slime. You can knead the slime in the bowl before you pick it up as well. This slime is ultra stretchy but can be stickier. However, keep in mind that although adding more solution reduces the stickiness, it will create a stiffer slime.
Via Little Bins for Little Hands
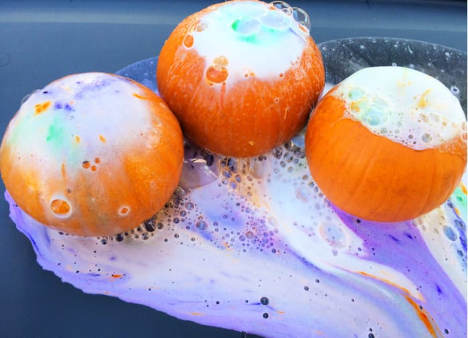
4. Pumpkin Volcano
Supplies:
Mini pumpkins
Dish soap
Baking soda
White vinegar
Food coloring: orange, purple, green
Knife
Tablespoon
Large plastic lid or container
Instructions:
Cut off the top of each pumpkin and scoop out the insides (this doesn’t need to be perfect). Place the pumpkins inside the container, we recommend bringing this activity outside as well. Add a couple of tablespoons of baking soda to each pumpkin volcano. Add a couple squirts of dish soap and then add one squirt of each color of food coloring to each pumpkin. Start pouring vinegar into each pumpkin, you’ll likely need about ⅓ cup for each. Watch the pumpkins erupt!
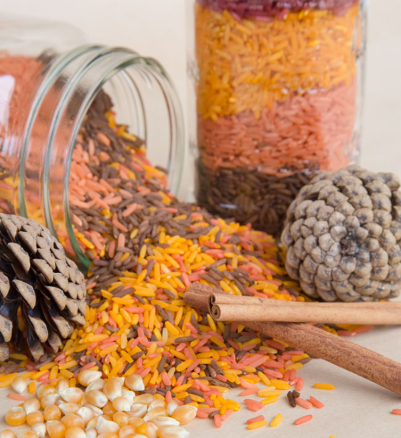
5. Fall-Scented Rice Sensory Bin
Supplies:
Large bin
White rice
Food coloring
Mason jars
Hand sanitizer or vinegar
Cinnamon powder
Pinecones
Instructions:
Start by collecting your materials. In addition to the supplies above you may want to add corn kernels, chestnuts, cinnamon sticks, streamers, feathers, popsicle sticks, etc. Any sort of craft item around the house. Next color the rice. Add a few drops of your gel or liquid food coloring in the jar. Now add a few drops of hand sanitizer or vinegar. Then add the desired quantity of rice. Make sure to leave enough room to shake the concoction. Next add one or two tablespoons of cinnamon powder to the mason jar. Then shake! Kids love to do this part! If you want multiple colors, repeat the process with the second color. Let the rice dry and then add it to the sensory bin. Add the additional various items to the bit and let your kid play away!
Via Mom vs. The Boys
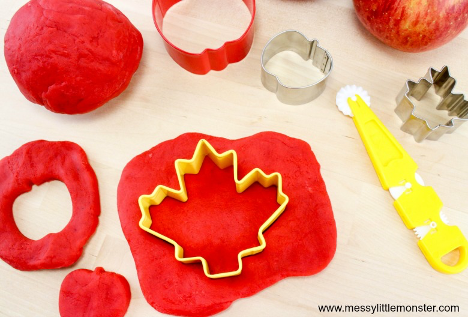
6. Apple-Scented Playdough
Recipe:
1 Cup flour
1 Cup water
¼ Cup salt
½ Tbsp oil
1 tsp cream of tartar
1 tsp nutmeg
1 tsp cinnamon
Red food coloring
Instructions:
Add all the dry ingredients together first into a large saucepan or pot. Next add the water, oil, and food coloring and mix those together as well. Add a lot of red food coloring if you want a bright red color. Next you’ll cook the mixture over a medium heat. You will need to stir the mixture constantly for 4-5 minutes until the mixture begins to form a ball. Once the ball of playdough has formed, flatten your playdough, fold it, and continue to flip it for about another minute until all the stickiness is gone. Remove your apple scented playdough from the heat and let it cool for a few minutes. Once the playdough is cool enough to handle, knead the playdough. If it’s still sticky then add a little bit of flour. If you cook it long enough then extra flour shouldn’t be needed!
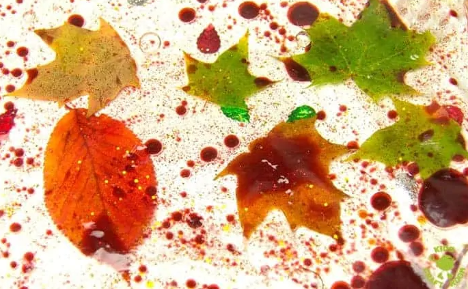
7. Leaf Sensory Bags
Supplies:
Sealable bags
Cooking oil
Liquid Water Colors
Leaves
Glitter
Sequins and/or Confetti
Instructions:
The first part of the activity is going outside and collecting the leaves. Then you’ll pour some cooking oil into the sealable bags and add your leaves. There isn’t an exact measurement of oil, but put enough in so that the leaves can easily glide along inside the bag but not so much that the bag is heavy at the sides. Now comes the fun! In a small pot mix a few teaspoons of water with a few drops of liquid water colour. Three colors is a good mix. Gently pour the coloured water in to the oil in stops and starts. The water won’t mix with the oil so you get a lovely globule effect of different coloured water sitting on top of the oil. Then pop in any other bits of sensory interest you like such as glitter, sequins, or confetti. When you’re done, seal the bag expelling the air as you go. If you If you leave large pockets of air in then it will stop the contents moving around inside easily and it might pop! You might want to double seal the bag with sticky tape to be sure it won’t leak and I wouldn’t advise using the sensory bag in a room with a carpet or anything tricky to clean just in case!
Via Kids Craft Room
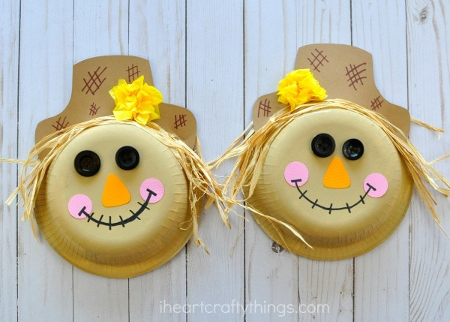
8. Paper Bowl Scarecrow
Supplies:
20 oz paper bowls
Tan paint
Paint brush
Black buttons
Raffia (or yellow construction paper strips)
Yellow tissue paper
Cardstock – orange, pink and brown (or construction paper)
Black and brown marker
Scissors
Stapler
Tacky Glue
Instructions:
Begin by painting the bottom of your paper bowl with your tan paint. Set it aside to dry completely. You can also use a paper plate for a more 2D effect. Cut two circles from the pink cardstock and a triangle from the orange cardstock. Cut out a hat from the brown cardstock. If you need help with the shapes a template is available here. Cut off several sections of raffia about 12-inches long. Add tacky glue to the top of the paper bowl and add your raffia to it. You will need to hold down the raffia for a minute or two to help it hold securely. You could also use yellow construction paper strips as an alternative to raffia. Use a stapler to staple the brown scarecrow hat to the top lip of the paper plate.Glue black button eyes onto your scarecrow face. Then glue on your scarecrow nose and cheeks. Layer three yellow tissue paper squares together and scrunch them up together to make a yellow flower. Glue it onto your scarecrow hat. Finish your paper bowl scarecrow craft by using your black maker to draw a mouth with stitches on your scarecrow and add some markings to the scarecrow hat with your brown marker.
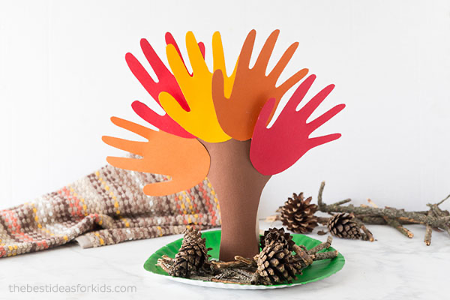
9. Handprint Tree
Supplies:
Cardstock – brown, yellow, red and orange.
Paper towel roll
Glue stick
Tape
Paper plate
Green paint
Pinecones and sticks for decoration
Instructions:
First, paint your paper plate green and set aside to dry. Cut four slits in the bottom of the paper towel roll and tape it to your paper plate.Then trace your hand and arm on the brown cardstock so that the “trunk” of the tree is long enough to cover the paper towel roll. Next trace regular handprints with your yellow, red and orange.You can have each member of the family trace their hands or have a bunch of just your kid’s hands.We recommend five hands but don’t exclude a family member just for symmetry. Glue your handprint “trunk” to your paper towel roll. Then glue your handprints to your tree. To cover the tape at the bottom, add some pinecones and sticks for decoration. Glue these down if you want them to be permanent. You may need to use hot glue if you want them to stay permanently. Have adults do this part or use cold hot glue that is rated safe for kids.
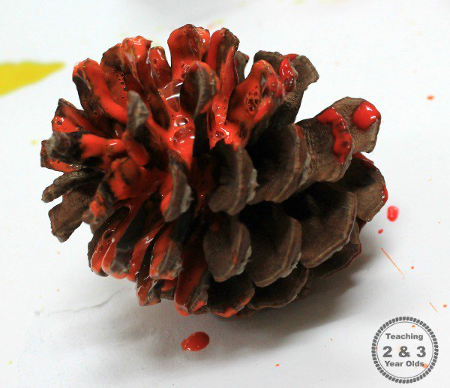
10. Pinecone Painting
Supplies:
Pine cones
Washable tempera paint
Droppers or pipettes
Brushes
Instructions:
This pine cone activity is super simple to set up, and strengthens toddler fine motor skills by squeezing the paint. Pour the paint into containers and place them on a table, along with the droppers and/or pipettes and/or brushes and the pine cones. Invite your toddlers to paint the pinecones! It really is as simple as that.
Via Teaching 2 and 3 Year Olds
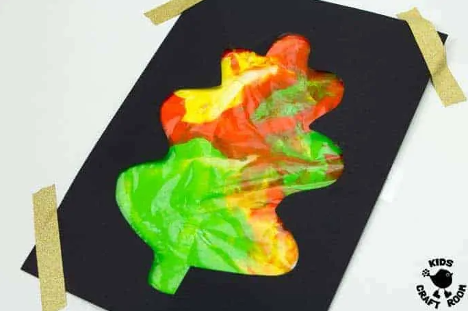
11. Mess-Free Autumn Leaf Painting
Supplies:
Black cardstock
Small sealable bags
Paint
Sticky tape
Instructions:
Start by cutting out a leaf shape from your black cardstock. Be careful to leave the frame whole. We recommend black cardstock because it has such a sharp contrast with the painting but you can use any color. Squirt some paint into your sealable bag. The more paint you put in the more easily the colors will mix and the more squishy and tactile the experience is for the children.Squash the air out of your zip lock bag and zip it up. If you want to you can add extra tape around the zip as well to help prevent leaks. Then tape your paint filled bag to the table top.Then tape the leaf shape on top. Now kids can squish and squash the paint around to fill the leaf with colors. Each time they touch and move the paint the picture in front of them will change.
12. Fork Feather Turkey

Supplies:
Plastic Forks
Washable Kid’s Paint
Construction Paper (or markers)
Googly Eyes
Kraft Paper
Paint Palette (or 4 plastic plates)
Instructions:
First create the body of the turkey using construction paper or you can draw a turkey body on a big sheet of construction paper. Next pour out the paint colors you want to use onto a pallet or four plastic plates and add a plastic fork for each color. After that it’s time for some painting. Have your child use each fork to create a feathered plume for the turkey. The more colors the better!