Wiggling Caterpillar Craft

- Caterpillar Template
- White Cardstock
- Washable Paint
- Paintbrushes
- Brass Fasteners
- Scissors
- Single Hole Punch
- Pipe Cleaners
- Tacky Craft Glue
- Tape
1. Print the template on white cardstock. You will need one template per child. Download the template here.
2. Invite kids to paint their template with washable paint. To make the caterpillar look similar to The Very Hungry Caterpillar, use a combination of red and orange for the caterpillar’s head, and blue, yellow, and green for the caterpillar’s body.
3. When the paint is dry, invite kids to cut out their shapes.
4. Use the single hole punch to punch out the small circles on the template.
5. Connect each circle with the brass fasteners. We used very basic fasteners from the office supply store, but many craft stores have vibrantly painted fasteners in the scrapbooking aisle.
6. Glue the caterpillar’s eyes and mouth to its head.
7. Invite your child to choose a pipe cleaner, then cut it to 4-inches.
8. Fold the pipe cleaner into a V-shaped curve, then tape it to the back of the caterpillar’s head.
Recycled CD Ladybug Craft
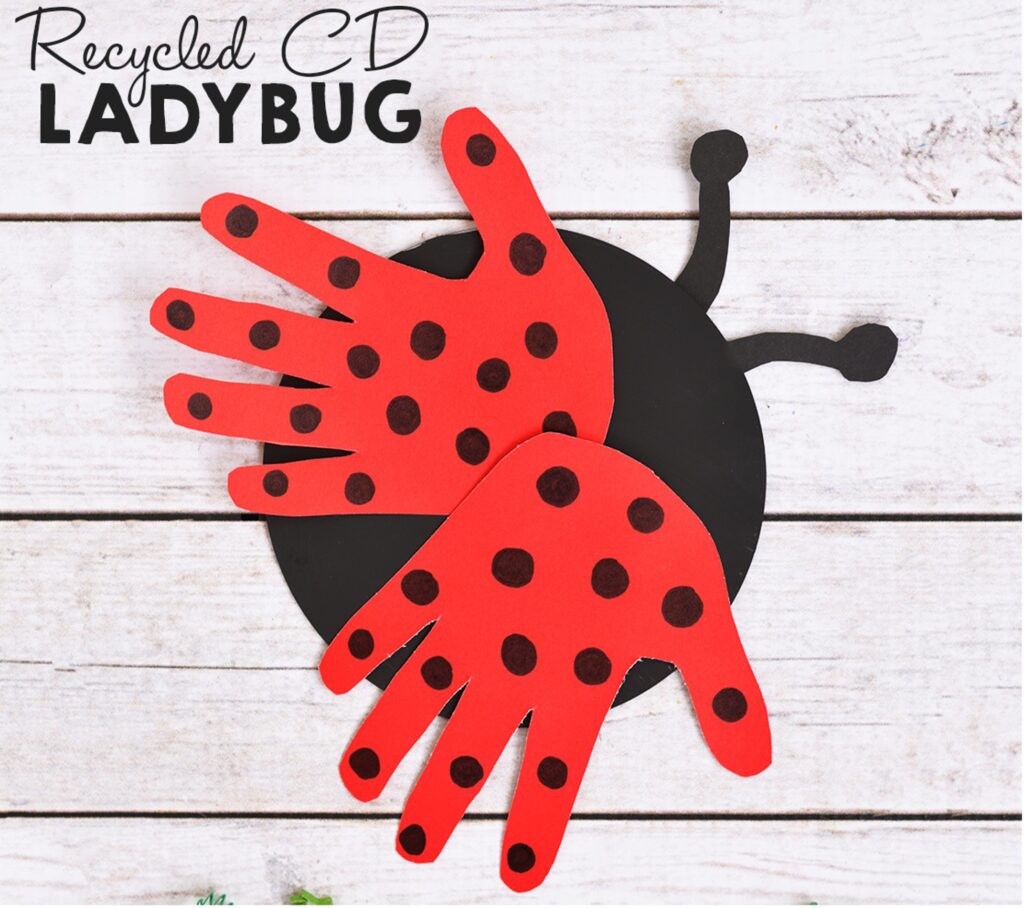
- CD
- Construction paper
- Black acrylic paint
- Glue
- Scissors
- Black marker
- Grab your old CD or DVD that you’ll be recycling for this project and you can either paint it black or cut out a black circle by tracing the CD and cutting that out, then gluing it onto your disc.
- Next grab some red construction paper and you’ll have your child trace out their handprints onto the paper and then cut them out. These are going to be your ladybug’s wings so you’ll want to take a black marker for the next step and color in some black circles
- Then finish off your Handprint Ladybug by cutting out some black antennas and gluing those and your handprints onto your painted disc.
Easy Paper Plate Butterfly
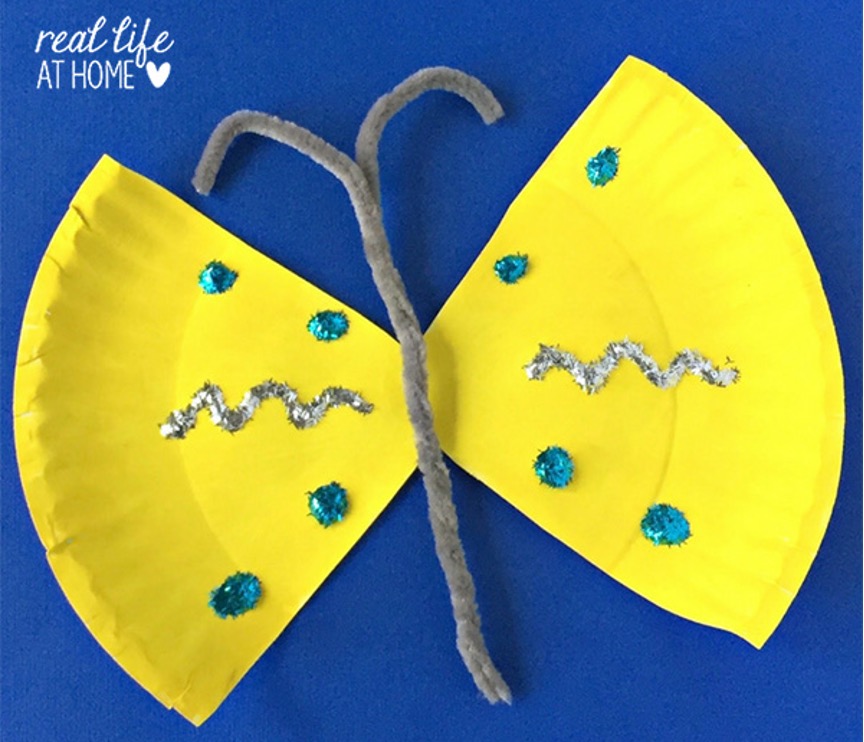
- Paper plates
- Paint
- Paintbrush
- Glitter
- Scissors
- Glue
- Pipe cleaners (2)
- Cut two triangles out of the top and bottom of the plate to create the butterfly body.
- Paint the plate the color (or colors) of your choice and allow it to completely dry.
- Place the dried painted plate on top of another clean plate (or another easy-to-clean surface) to help keep the glitter from making a mess.
- Sprinkle some glitter on top of the glue and gently shake the excess glitter off onto the bottom plate.
- Twist the pipe cleaners together halfway up and form antennas toward the top. Glue the pipe cleaners to the center of the butterfly.
Clothespin and Watercolor Butterfly Craft
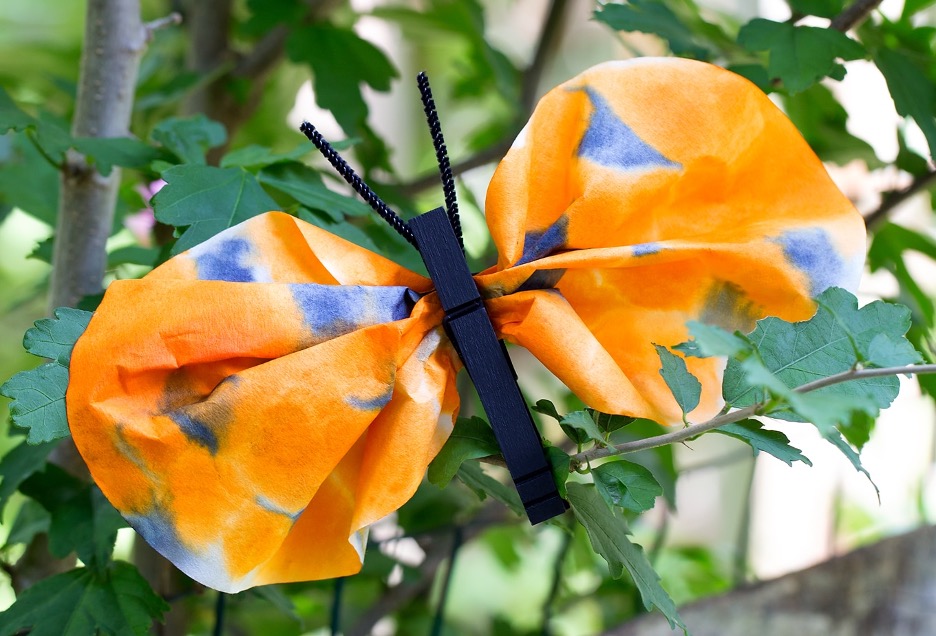
- Coffee filters
- Orange and black liquid watercolors
- Pipettes or eye droppers
- Black pipe cleaners
- Black acrylic paint
- Scissors
- Paintbrushes
- Paper towels
- Craft tray
- Spray bottle filled with water
1. After gathering supplies, place several sheets of paper towel in a craft tray, then lay 1 sheet of color diffusing paper or 1 coffee filter over the paper towels.
2. Pour the liquid watercolors into small mason jars, muffin tins, or paint trays.
3. Invite your child to use a pipette or dropper to distribute the orange and black liquid watercolors over their color diffusing paper or coffee filter.
4. When your child is satisfied with their paper or coffee filter, invite them to spray water over it. Watch as the color diffuses across the paper!
5. Set your child’s tray aside to dry.
6. While their paper is drying, invite your child to paint a wooden clothespin with black acrylic paint. When they are done, they can prep their butterfly’s antennae by cutting a black pipe cleaner in half, then folding it into a V.
7. When all the materials are dry, show your child how to scrunch their paper in the middle, then slide it inside of the clothespin to make wings for their butterfly. Once the paper is inside of the clothespin, they may wish to fluff out their butterfly’s wings.
8. Last, slide the pipe cleaner into the top of the clothespin. If you desire, secure the tip of the clothespin with a drop of craft glue.
Clothespin Bee Craft
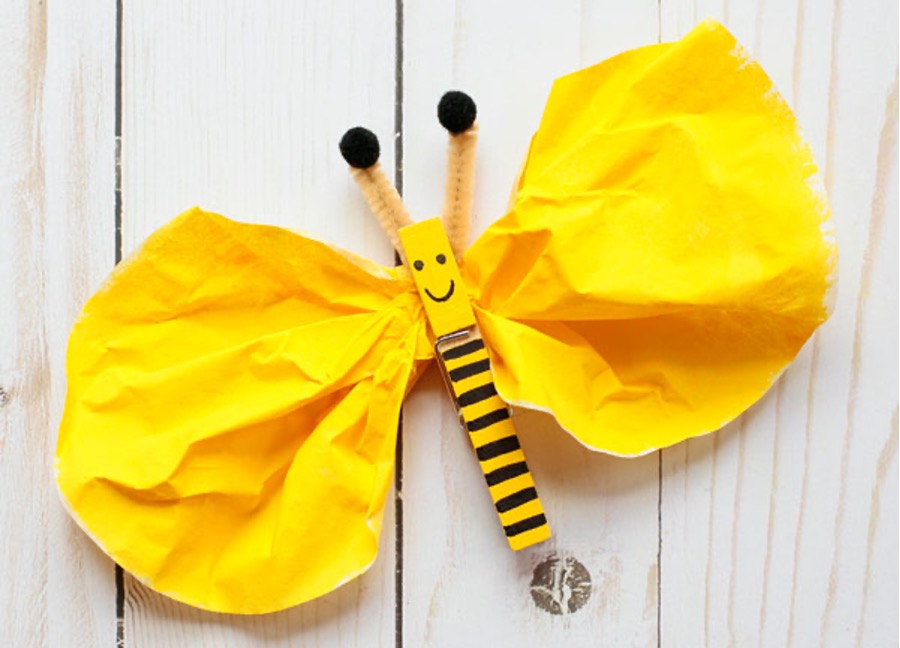
- Wooden clothespin
- Yellow paint
- Paintbrush
- Black marker
- Coffee filter
- Pipe Cleaner
- Two black pom poms
Step 1: Paint the coffee filter yellow. Set it aside to dry.
Step 2: Paint one side of the clothespin yellow. Once it’s dried, use a black marker to draw eyes, a mouth and stripes.
Step 3: Gather the coffee filter in the middle and secure it with the clothespin.
Step 4: Use the pipe cleaner to make antennae. Cut part of it and glue two small black pom poms at both ends. One pom pom goes at each end. Bend the pipe cleaner in a V shape and add it on top of the coffee filter.
Colorful Caterpillar Suncatcher
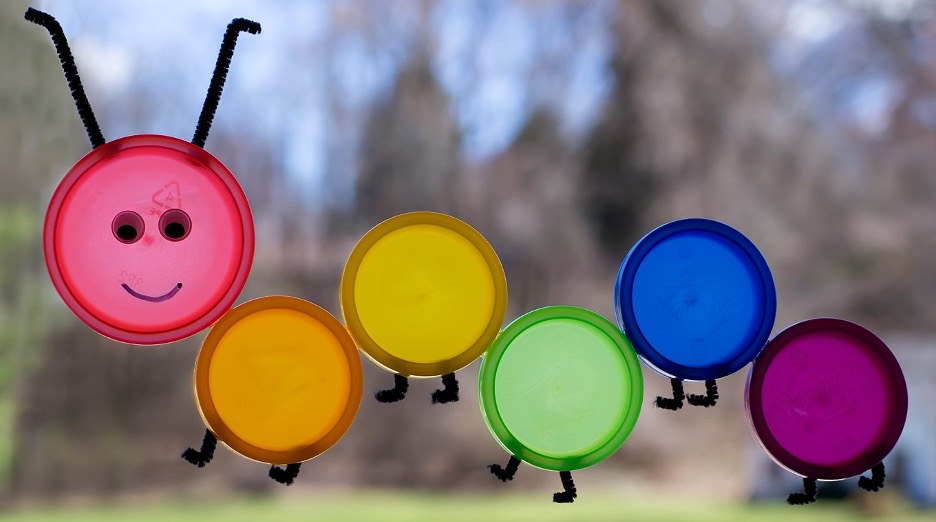
- Play Dough Lids (5 small, 1 large)
- Glue dots
- Googly eyes
- Black permanent marker
- Black pipe cleaners (2)
- Tape
- Scissors
- After gathering supplies, attach the Play-Doh lids to each other with Glue Dots. The large Play-Doh lid will be your caterpillar’s head.
- When the caterpillar’s body is finished, stick 2 wiggly eyes to the large Play-Doh lid. Use the black permanent marker to draw a smile on the caterpillar’s face.
- Next, use scissors to cut 2 antennae for the caterpillar from a black pipe cleaner. Our antennae were about 2 inches long. Stick them to the back of the large Play-Doh lid with Glue Dots.
- Last, use scissors to cut 10 fuzzy legs for the caterpillar from the remaining pipe cleaners. Our legs were about 1 inch long. Bend the ends of both the legs and antennae to complete your caterpillar!
Wooden Spoon Bee Craft
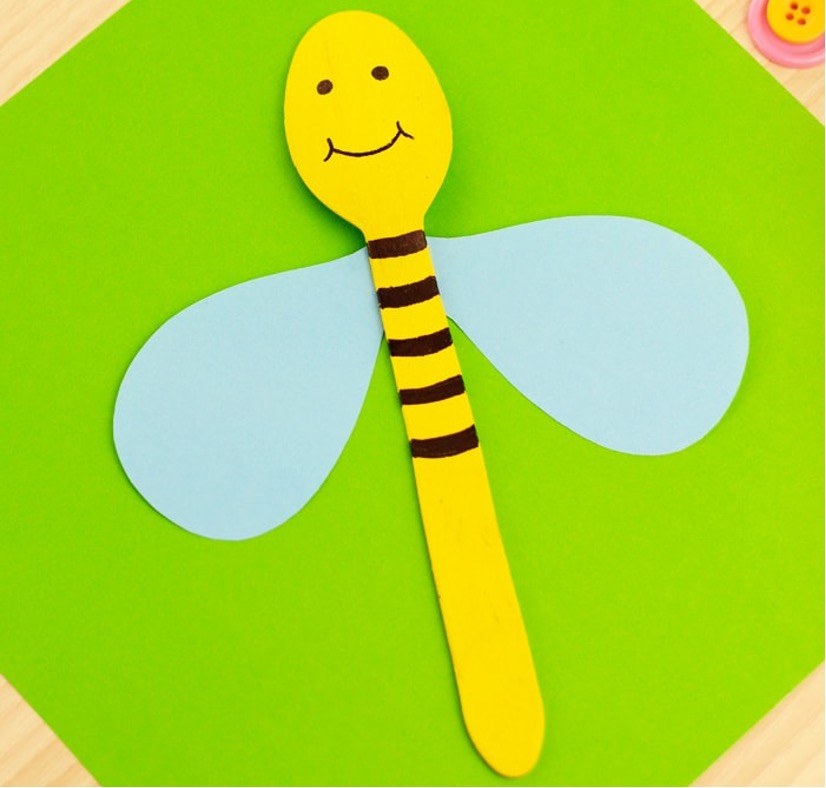
- Wooden spoon
- yellow paint
- brush
- Black Sharpie marker
- blue construction paper
- glue and scissors
- Color the wooden spoon yellow. Allow it to dry completely.
- Once the paint is completely dry draw a face and stripes with s black Sharpie (or other permanent marker).
- Cut two wings from blue construction paper and glue them on the back of the wooden spoon (white school glue does a great job).
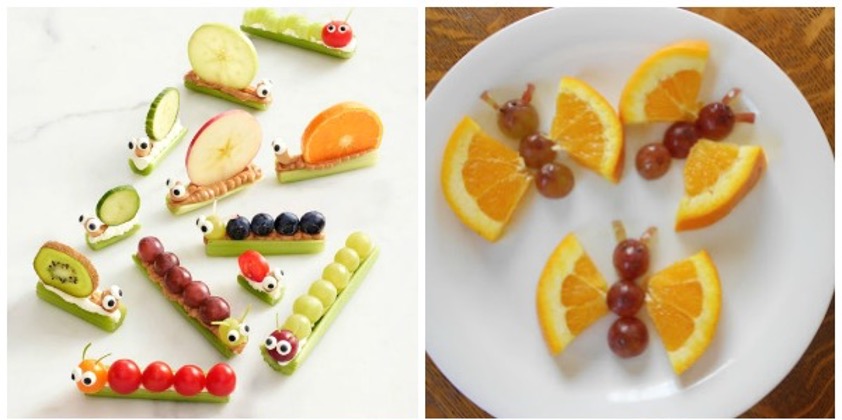
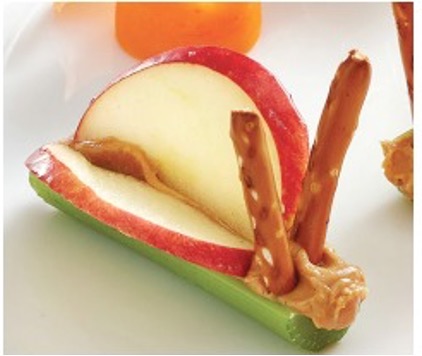
Fun Snacks for Everyone!