This no better time to craft then when the weather starts to turn cold and the kiddos are home from school. Christmas crafts have the dual purpose of usually working as a tree ornament as well. Make sure to keep these crafts in a safe place for when your kids get bigger, you’ll want to see just how small they once were year after year.
Paper Plate Christmas Tree
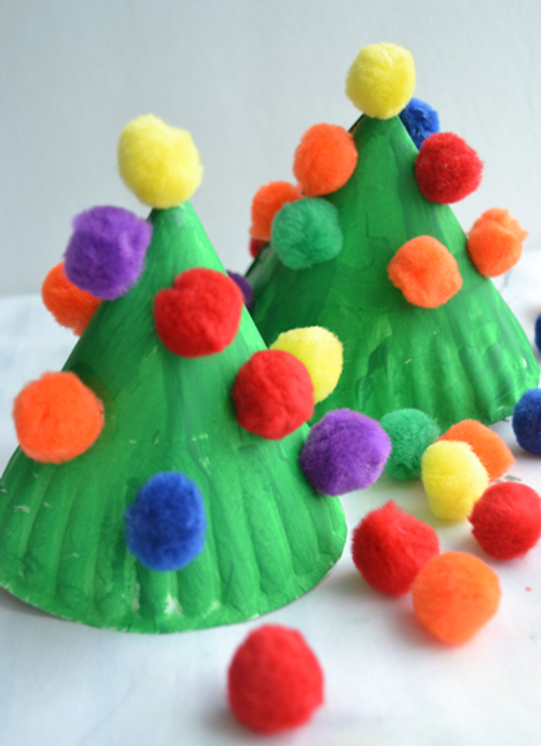
Materials Needed:
Paper Plate (1 per tree)
Clear Tape
Green Paint
Glue (school glue or tacky glue)
Multicolored Pom Poms
Optional: stickers, beads, gems, buttons, sequins
Instructions:
Start by cutting out a quarter wedge of the plate. Like you’re cutting a large pizza slice.
Roll the plate into a cone shape and seal with tape. Keep the tape on the inside or your paint will be uneven.
Paint the cone green. You can also paint the plate ahead of time and tape it once the paint has dried. Sometimes it’s more fun to paint on a different shaped object like a cone though.
After the paint dries, glue on your poms poms or whatever other tree decorations you have on hand.
Clothespin Reindeer Ornaments
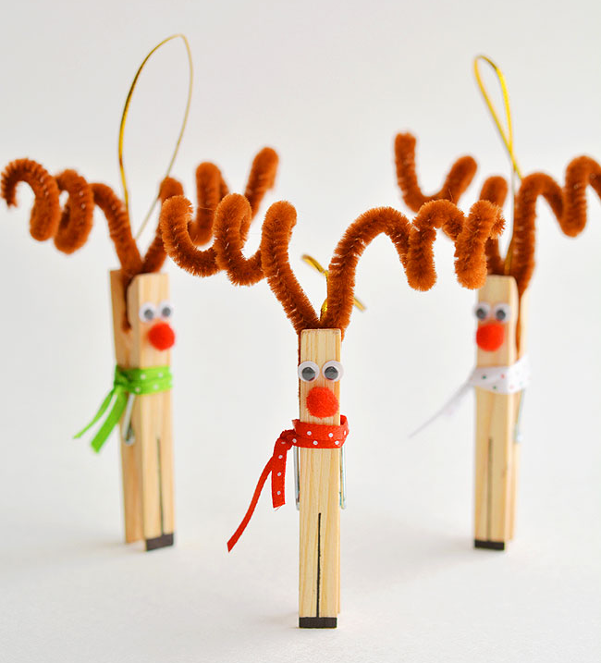
Materials Needed:
Clothespins
Pipe Cleaners (12 inch, brown)
Ribbon (1/8 inch)
Mini Pom Poms (1/4 in., red)
Mini Googly Eyes (5 mm)
Gold Cord (or ornament hanger)
Black Pen or Marker
Glue Gun or School Glue
Instructions:
Start by creating the reindeer’s legs and hooves. Using a pen and a ruler, draw a straight line on the bottom of the clothespin. The line should be about 1.25 inches long and go roughly to the “spring” part of the clothespin. Then color in a rectangle about 1/8-inch-thick at the very bottom of the clothespin to make the hooves. Do this on both sides.
Next make the antlers. Take the brown pipe cleaner and bend it in half. Take each end of the pipe cleaner and roll them into a spiral around your finger. Try and make at least two spirals on each side. You can also use a marker or pencil instead of your finger for a tighter spiral.
Attach the gold cord (or ornament hanger) to the antlers with glue and then insert the antlers into the open clothespin. Gluing the antlers inside the clothespin is optional but it will make it last for years to come.
Using a glue gun or school glue, attach the googly eyes and the pom pom nose.
Next, tie the ribbon around the “neck” of the reindeer to add a little scarf.
Santa Searchers
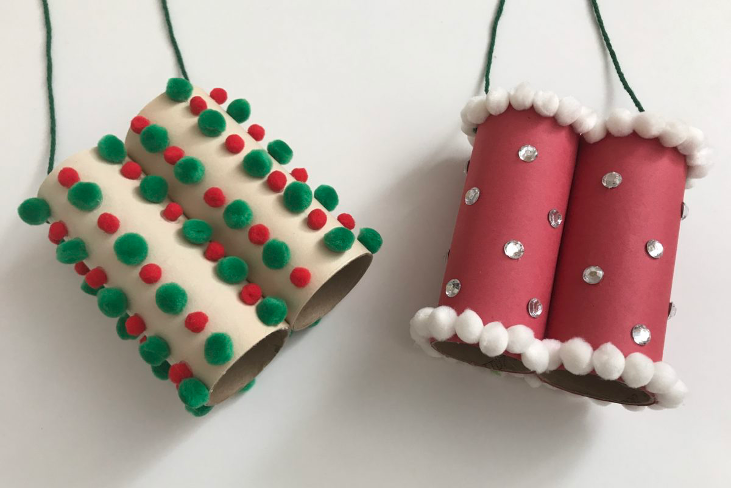
Materials Needed:
2 Empty Toilet Paper Rolls per searcher
Construction Paper
School Glue
Decorative Items (Poms poms, sequins, gems, buttons, etc.)
Embroidery Floss, String or Costume Necklace (used as the binocular strap for around their neck)
Instructions:
Cut the construction paper to the length of the paper roll. Wrap the construction around the paper rolls and glue into place.
I found that once the paper rolls were wrapped with construction paper, they needed to be hot glued together. It dries faster so you can start decorating immediately, and it is sturdier.
For toddlers it is easiest to make glue dots for them, and then let them choose and place their decorative items on. Older children can be independent with this activity and embrace their creative side!
When you are done decorating, punch holes on each side and fasten embroidery floss, string, or costume necklace to create a strap.
Let your child take in all the wonders of the season and try to catch a glimpse of Santa!
Snowflake Paper Plate Twirler
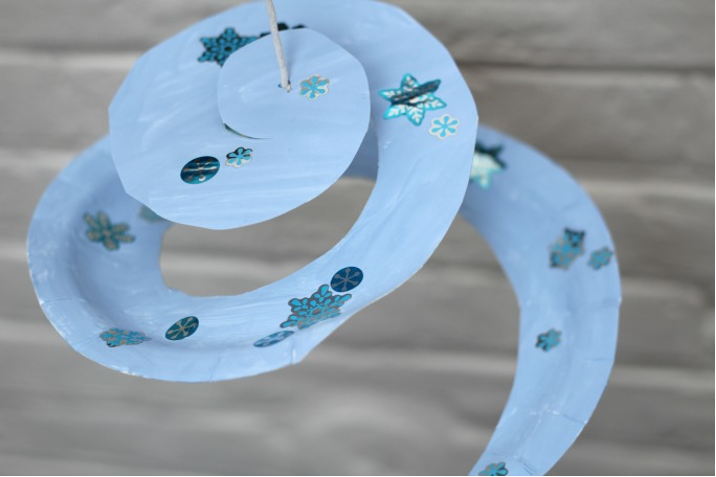
Materials Needed:
Paper plate
Blue paint
Decorative items (stickers, gems, pom poms, glitter, etc.)
String
Instructions:
Either use a white paper plate and paint it blue or buy blue paper plates.
Cut your paper plate in a spiral shape going from the outside in, this is a great one for kids to practice their scissor skills but younger ones might need a hand to make sure they don’t chop off the end of the paper plate.
Then decorate! Keeping a theme of white, silver, and blue will make it appear more like snow.
Next is adding your string to your whirligig so that it can spin around. Using scissors make a hole in the center of your paper plate.
Push your string through the hole, tying a knot underneath and your whirligig is now ready for spinning, perfect for hanging from the ceiling too!
Via Crafts on Sea
Giant Gingerbread People
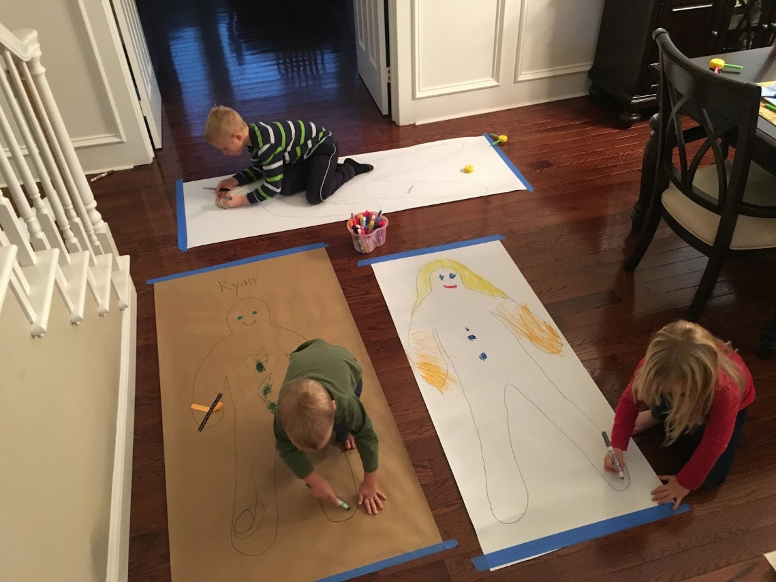
Materials Needed:
Large Roll of Paper (brown paper will make it more gingerbread looking while white will be more of a snowman look)
Painter’s Tape
Sharpie
Washable Markers and Crayons
Decorative Items (stickers, washi tape, pom poms, buttons, yarn, etc.)
Instructions:
Start off by laying out a big roll of paper and then taping down the ends with painter’s tape (or around the entire paper). Make sure the paper you lay out is long enough for the child that is going to lie down on it.
Next use a Sharpie to trace around their body. Make sure to keep the head, arms, and legs nice and rounded for “gingerbread accuracy”
Once their gingerbread man is traced let them start decorating! Yarn can be used for hair, buttons for eyes, pom poms for buttons, etc. Let them get creative.
Via Toddler Approved
Pinecone Painting
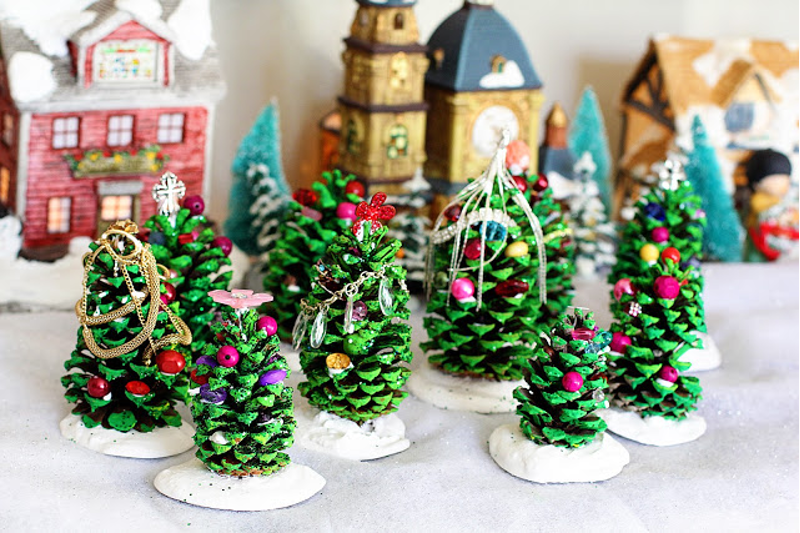
Materials Needed:
Pinecones
Green Paint
Plaster (if you want them to be stationary décor) or String (if you want them to be ornaments)
Decorative Items (Glitter, gems, costume necklaces, etc.)
Instructions:
Start by letting your kid(s) go out and pick their perfect pinecone “trees.”
Next paint each pinecone green. If you want to add glitter do so while the paint is still wet.
Continue decorating the pinecones. A great way to add ornaments is by cutting up costume necklaces.
If you want the trees to be stationary décor, mix up a bucket of craft plaster. Add white glitter for a little more shine in your snow. Make a small ball for each “tree” and let your kid(s) plant them in the snow.
If you want to make the trees to be ornaments, instead just tie a string around the pinecone.
Paper Plate Penguin
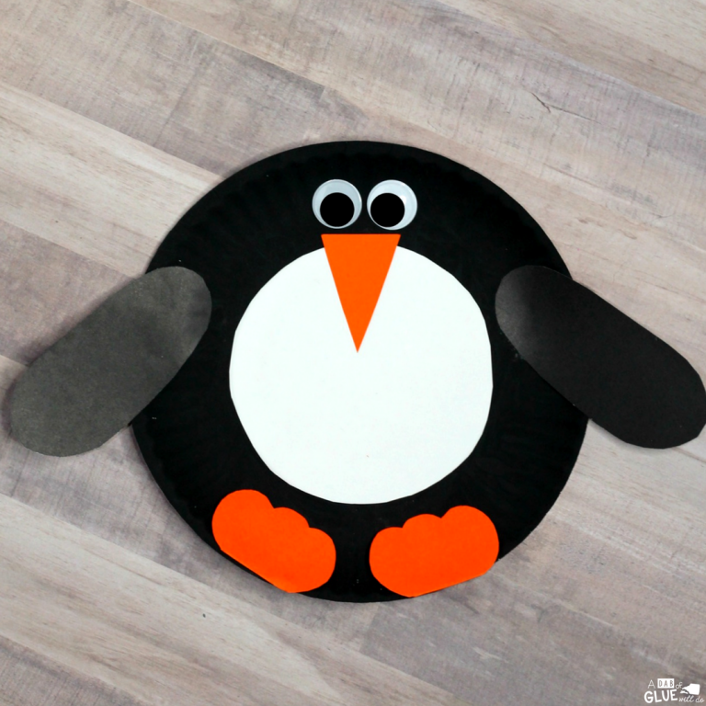
Materials Needed:
Paper Plate
Black Paint
Paint Brush
Construction Paper (White, Orange, Black)
Googly Eyes
Glue
Instructions:
Start by painting the paper plate black.
While it’s drying, cut out shapes from the construction paper. Cut a circle from the white construction paper, a triangle from the orange construction paper, two small ovals from the orange construction paper, and two large ovals from the black construction paper.
Glue the white circle to the center of the black paper plate.
Then glue the orange triangle to the top of the white circle.
Next, add the googly eyes.
Glue down the two small orange ovals as the penguin’s feet.
Finally, glue down each of the two large black ovals as the penguin’s wings. If you want the wings to move, you can attach them using metal brads instead of glue.
Pom Pom Mitten Ornaments
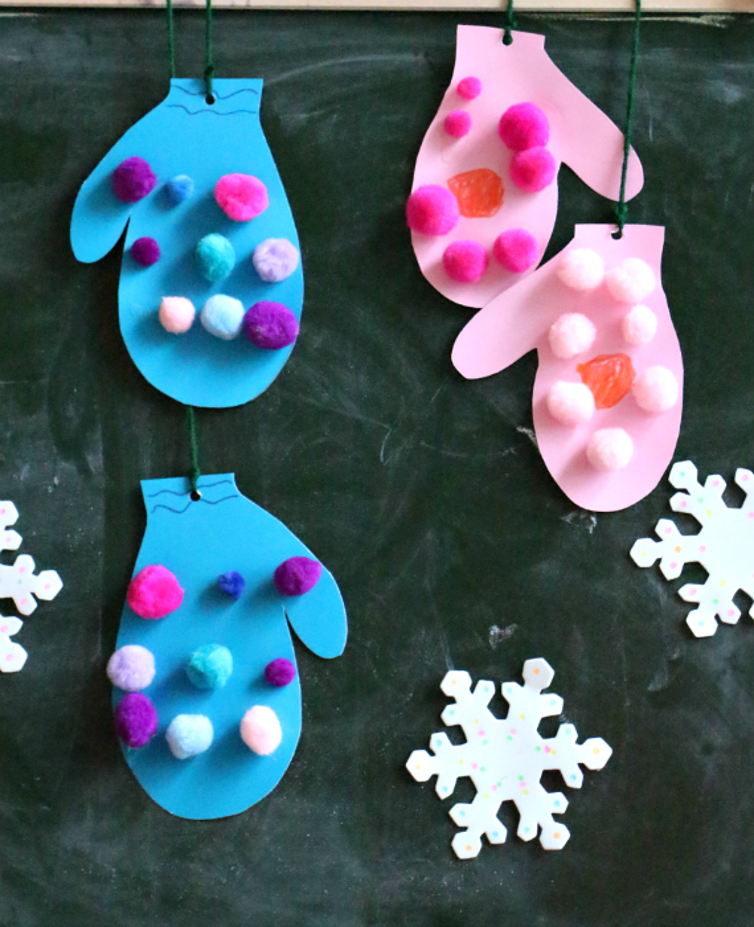
Materials Needed:
Card stock or construction paper
Yarn
Hole Punch
Pencil
School Glue
Decorative Items (Pom poms, beads, stickers, etc.)
Instructions:
Start by folding your card stock or construction paper in half.
Next trace of have your child trace their hands. (Keep it round for the mitten shape)
Cut out the mitten shapes. Do this as many times as you want.
Next, decorate! Add poms poms with glue or let your kids get creative with what they want to put on each mitten.
Punch a hole in each mitten and add string to make them into cute ornaments.
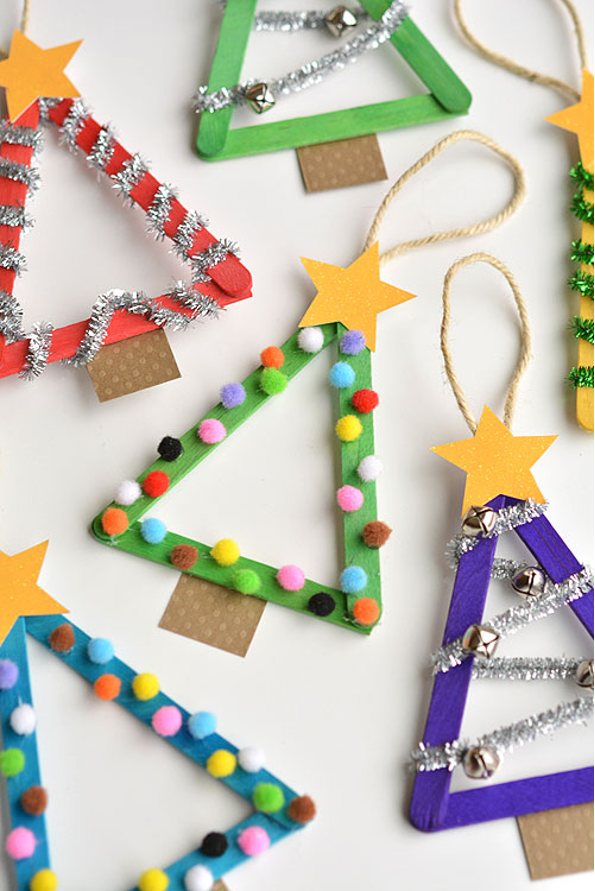
Popsicle Stick Christmas Trees
Materials Needed:
3 Popsicle Sticks per tree
Brown Card Stock
Glittery Card Stock
Glue Gun
String or Twine
Decorative Items (Pom poms, pipe cleaners, gems, buttons, glitter, etc.)
Instructions:
Start by cutting the card stock for your children. The glittery card stock should be cut into stars and the brown card stock should be cut into 1×1 inch squares.
You can use colored popsicle sticks or paint them the way you want them. When they’re dry, cut about 1 inch from the end of one of the popsicle sticks.
Next, use a hot glue gun to glue the popsicle sticks into a triangle with the short popsicle stick on the bottom of the “tree.” You can add string at this point by gluing string or twine in between the top two popsicle sticks.
Next glue the start to the top of the tree.
Then it’s time to decorate! Add pom poms or wrap sparkly pipe cleaners around the tree, whatever your heart desires!
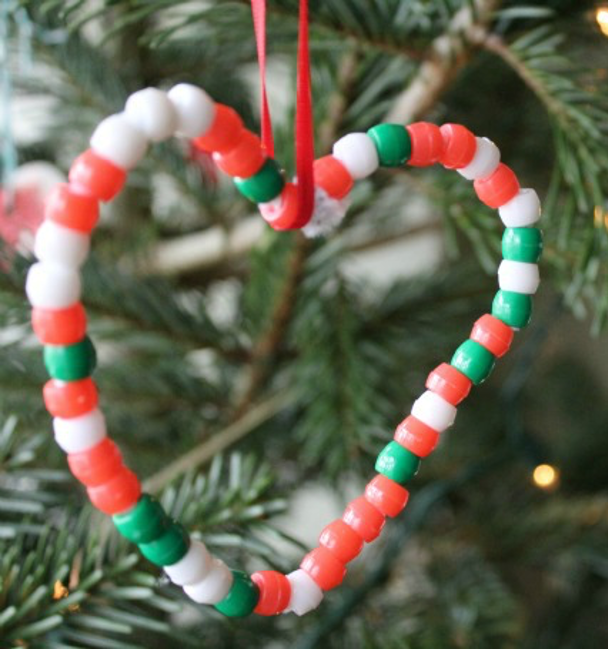
Beaded Heart Ornament
Materials Needed:
Pipe Cleaners
Beads
Ribbon
Instructions:
This one is a pretty simple craft, but it can be a great way to promote fine motor skills while coming out of it with a cute ornament.
Start by having your kids thread the beads onto the pipe cleaner until it is full. Tip: fold over one end of the pipe cleaner a couple of times so the beads don’t get pushed off the other end.
Once your pipe cleaner is nearly filled with beads, twist the two ends together and then shape the pipe cleaner loop into a heart shape with the twisted bit in the middle. Add a ribbon to hang it and you’re done!
Via Crafts On Sea
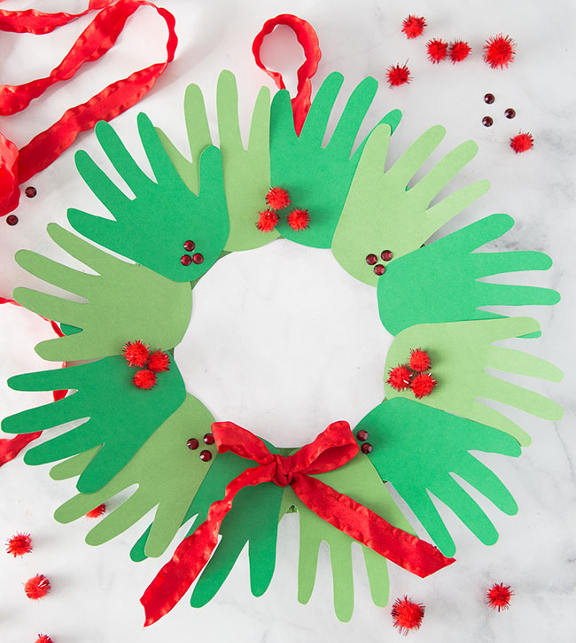
Handprint Wreath
Materials Needed:
Green Cardstock (various greens look best)
Red Pom PomsRed Craft Rhinestones
Red Ribbon
Paper Plate
Green Paint (optional)
Instructions:
First cut out the circle center of your paper plate. Then paint it green. This is optional as most of the paper plate won’t be shown but a few small pieces may peak through.
Now cut out your handprints. You need 12 handprints – in the photo there are 6 lighter green and 6 darker green colored handprints.
Because you need quite a few, you can trace one and then use that to trace the rest. You can also fold over the cardstock 4 times so that when you’re cutting you get 4 handprints. Or if you have a larger family, you can have each handprint be a different family member.
Now glue to your paper plate. Alternate the different green handprints when gluing down.
Next, glue on your pom poms and rhinestones. Putting 3 together makes them look like holly.
Finally add a red ribbon bow to the front and a loop of ribbon to the back for hanging.
You can also laminate this item if you want to keep it from getting wrinkled between Christmases.
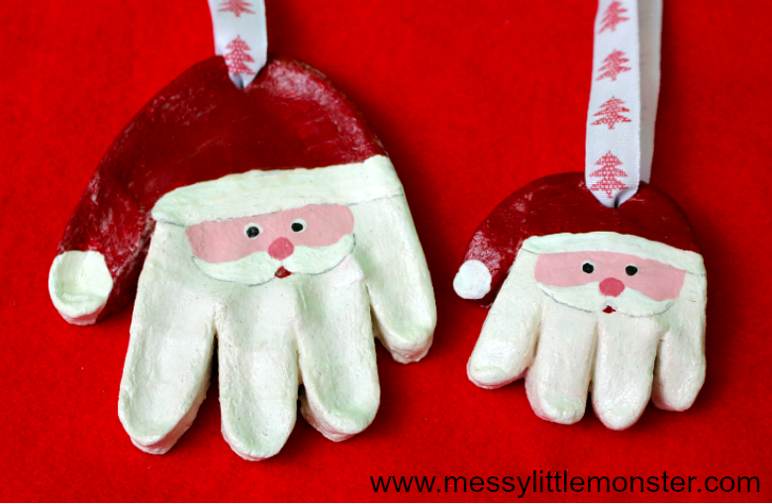
Santa Salt Dough Ornaments
Materials Needed:
2 Cups of Flour
1 Cup of Salt
1 Cup of Water
White, Red, & Pink Acrylic Paint
Mod Podge sealer
Ribbon
Instructions:
The first thing that you will need to do is make your salt dough! It’s not a good idea to make salt dough ahead of time as it does start to dry out, so when doing this activity with older kids I like to include making salt dough as part of the activity. Toddlers and preschoolers love helping to measure, tip, stir and knead the dough too!
Roll the salt dough into a ball and flatten it either using the palm of your hand or a rolling pin. The flattened ball of salt dough needs to be just slightly larger than the child’s hand who you would like to take handprints from. The salt dough needs to be about 1cm thick once flattened.
Press your child’s hand onto the salt dough to create a handprint. For babies and younger toddlers, it might take a few tries before you get the perfect handprint imprint. The great thing about salt dough is that if you are not happy with the handprint you can just roll up the salt dough and try again.
Carefully cut around the salt dough handprint using a sharp knife. Take your time doing this as this will make the shape of your salt dough ornament. Look really carefully to make sure you get the exact shape of your child’s hand. Once you are happy with the shape of the handprint run a finger gently around the edge of the handprint to make sure that there is a smooth edge.
Alternatively, you could leave the salt dough as it is with a handprint in the center.
You need to make a small hole in the salt dough at the top of the handprint if you want to be able to hang your Santa handprint ornament up with ribbon. We have found that the best way of doing this is to push a straw into the salt dough, when you remove the straw the salt dough will remain inside the straw leaving a small hole.
Now you have created the shape for your salt dough ornament you need to dry out the salt dough. We have found that the best way to do this is to place the salt dough in the oven for a few hours (until the salt dough has completely dried out) at about 200⁰F. It helps the drying out process if you turn your salt dough handprint once or twice during the drying out process.
Alternatively, you can leave the salt dough to dry out in a warm room, but it will take several days as these salt dough handprints are quite thick or you can dry them out salt dough in the microwave.
Paint the dried-out salt dough with white acrylic paint. This will give you a good base color to begin painting your Santa design onto the handprint ornament.
Once the white paint has dried it is time to turn the salt dough handprint into your Santa craft! I would suggest drawing Santa’s face onto the salt dough with pencil first to make sure you are happy with it before you start painting. You need to draw lines to represent Santa’s hat (including the white trim), Santa’s face shape, moustache and facial features.
Once you are happy with the way your pencil drawing looks begin painting Santa’s face. Start by painting Santa’s hat. The hat is made up of the thumb and carries on across the palm of the handprint. Then paint the face shape making sure that you leave room for the trim of Santa’s hat and his moustache. You will then need to leave these paint colors to dry before painting the rest of the Santa handprint.
Once the paint on the face and hat have dried add face details, a trim and bobble for the hat and a moustache. Leaving the pencil line can look effective as it helps the features on your Santa handprint ornament to stand out.
It is really important that you varnish your salt dough ornament as if any moisture gets inside the salt dough it will make it go soggy. Use Mod Podge sealer to make sure this doesn’t happen.
Once the sealer is fully dry thread some ribbon through the hole you made in your salt dough at the top of your Santa handprint. We found some Christmas ribbon filled with Christmas trees that look lovely with the Santa handprints. Your salt dough Santa handprint ornament is now ready for hanging on the Christmas tree!
